Levitating Top
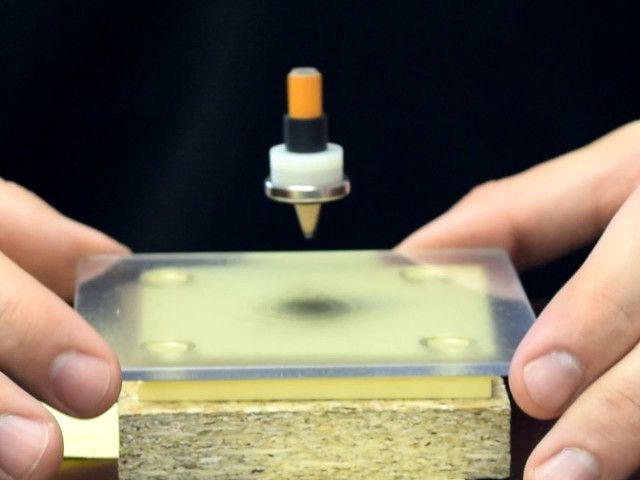
Last month's article about levitation was so much fun, we thought we'd do another! This time, we learn about how the gyroscopic forces of a magnet spinning like a top can temporarily overcome the stability issues and levitate for several minutes.
Spin Stabilized Magnetic Levitation
Though magnets can repel one another, you can't make one magnet just float in the air above another magnet. The force is strong enough, but the setup isn't stable. The floating magnet tends to fall to the side, or flip around to attract to the base magnet.
To make levitation work, you need to add stability. In spin stabilized magnetic levitation, the gyroscopic forces of a spinning top seem to do the trick.
Just like it's easier to balance on a bike in motion than one standing still, the spinning of the top provides the needed stability.
Note: Riding a bike is easier than getting one of these tops to spin. Even with a perfect setup, it takes a lot of effort and persistence to get it balanced just right.
Historical Research
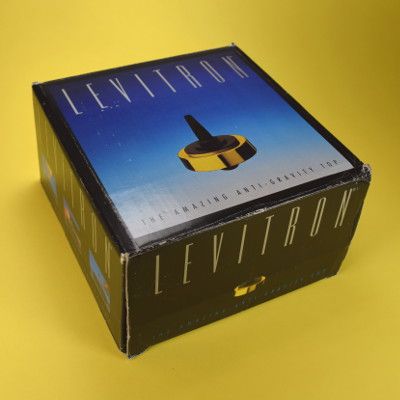
This phenomenon was originally discovered in the 1970s. It was patented by two different inventors, and there's some controversy about who invented what. It was sold as a toy, most popularly in the mid to late 1990s.
We haven't seen these things in stores lately, so we purchased an old one from eBay. We had to try one out for ourselves. As we suspected, it used weaker, old-style ceramic magnets in both the base and the spinning top. We wanted to see if we could make one ourselves using neodymium magnets, but figured we'd start with a known-good, working example.
Frustrating Work
Even starting with the Levitron® toy, it took a lot of time to actually get the top spinning. There are several different adjustments to get the balance just right. It can be hard to figure out which control to adjust, and even which way to change it!
These adjustments include:
- Leveling the base magnet. The toy provided plastic wedges, but we ended up using stacks of PostIt® notes for finer control. This adjustment helps account for imperfections in the symmetry of the magnetic field up in the region where the top floats.
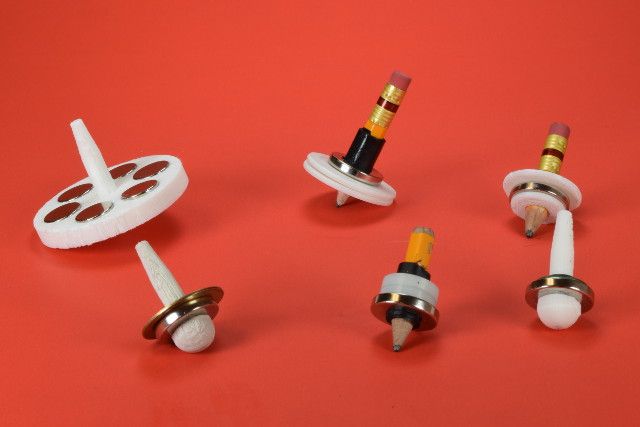
- The weight of the top. The toy included several brass and plastic washers that could be set on the top's post. This allows for tiny adjustments of the weight, by fractions of a gram. This device is so sensitive, the weight needs to be adjusted because of changes in temperature. Just warming a magnet in your hands can change the delicate balance.
- Spinning the top just right, not too fast or slow.
- Lifting the spinning top carefully from the base, bringing it into the small region of stability.
If you want to try this sort of thing yourself, be prepared for a long period of experimentation before getting it working. The sweet spot of stability is small and hard to find.
Base, Neodymium Style
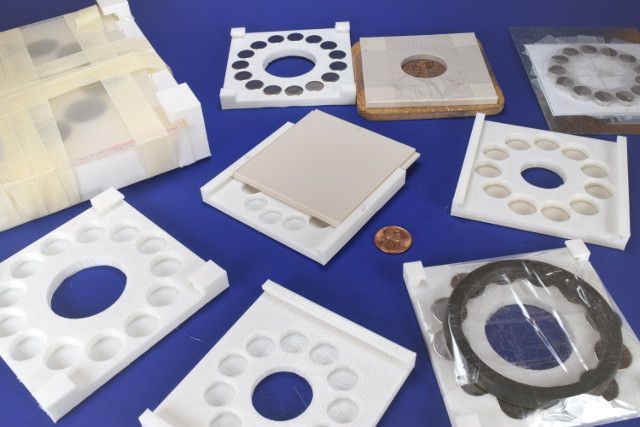
A big ring magnet serves as the stationary, base magnet in these devices. The one's we've seen use a large ceramic ring magnet to provide the repelling force. They can be as large as 3-4 inches in diameter.
In the example we bought, the base magnet was actually a simple block shape, but it had an area at the center that was not magnetized. It seems to perform much like a ring magnet.
We don't offer many neodymium ring magnets this large. The big ones we do have are much too powerful for this spinning top setup. What we needed was a ring with a fairly large diameter, but also something that isn't too powerful. It should be thin, and not have too much magnet material.
To prototype this quickly, we made a compromise. Instead of constructing a big, thin, fragile neodymium ring magnet, we mimicked a big thin ring using a series of magnets arranged in a ring pattern. With a series of disc magnets arranged with all of their north poles facing upward, the array mimics a single ring magnet. There might be some differences in the field very close to the magnets, but up above them where the top floats, we figured it should be a close enough approximation.
Neodymium magnets repel each other in this ring-like configuration, so we came up with a few ways of holding them in place. We 3D printed a few bases. We drilled holes in a wood block to hold the magnets. We even tried simply sticking them to a sheet of steel and taping them in place.
After much trial and error, success!
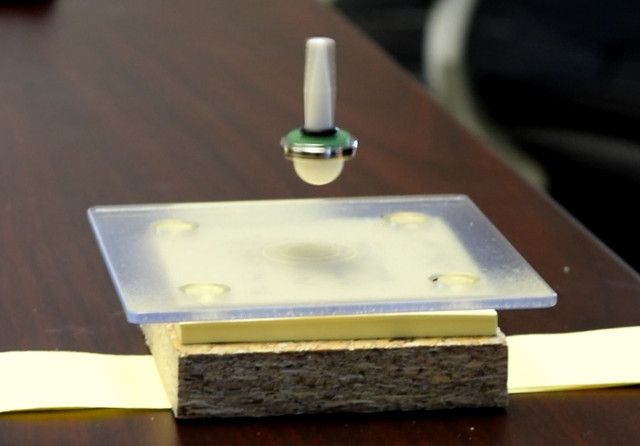
Shown here is the setup we finally got working ourselves.
Our tops were constructed around an RC62 ring magnet, 3/4" O.D. x 3/8" I.D. x 1/8" thick. The body of the top shown above is a plastic, 3D printed part. Plastic or brass washers provided the adjustable ballast weight.
The base is made with 13 disc magnets, using our 1/2" diameter x 1/8" thick D82-N52 discs. They are set into drilled holes in a block of wood, all of them with their north poles facing up.
If you're crazy enough to try constructing one of these yourself, download the PDF drawing of base that you can try. If you can 3D print, Thingiverse models for the top and the base. Consider getting a D68PC-RB magnet to help identify the poles. Even if you're wildly successful, be prepared to spend many hours getting it right. We've spent way too many evening hours struggling with this one!
(We don't sell these levitating tops.)
Want to see even more about how we made this?
In Which We Went Home
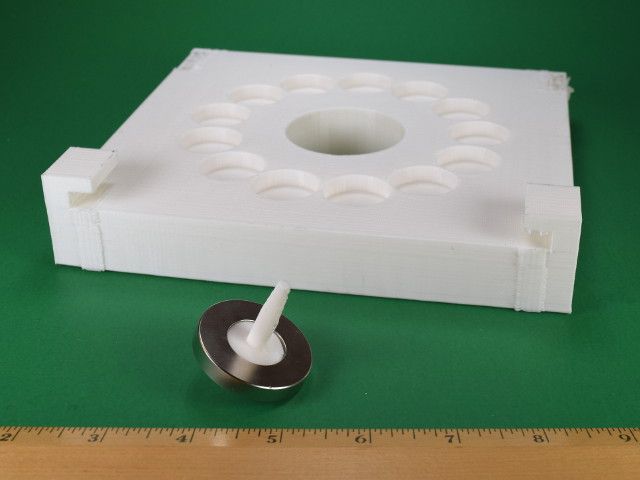
In the spirit of Mythbusters, it seems fitting to take all of this success and then pump it up a notch for the finale. A good conclusion might take it to the extreme; go big or go home. We doubled the scale of our earlier success and built a base with thirteen 1 inch diameter DX04B-N52 magnets. Doubling the size of the top as well, we chose the RX8C4 ring magnet, a powerful magnet indeed.
The theory was that, if successful, we should double the levitation height. Right?
It held promise, but we have not been able to get this to work.
Technically...
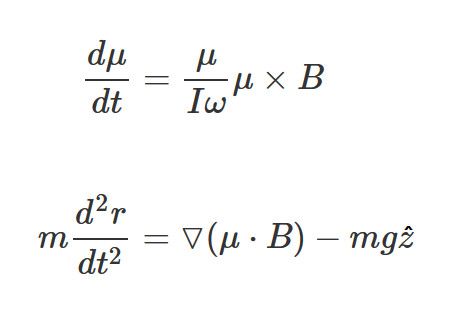
We hoped to include a short description about how spin stabilized magnetic levitation actually works. Without diving too deep into incomprehensible physics equations, we wanted to share the hows and whys in plain language. The more we learned, however, the more difficult this became. It turns out there's a lot more involved than you might initially think.
We figured there ought to be some comparison with the stability of a bicycle, which everyone ought to understand. What we found further confounded us. It turns out there are some recent papers describing how bikes aren't stable because of gyroscopic forces of the spinning tires, but because of some interesting details in the way the steering is setup. Bikes self-steer to stay upright because the front wheel contacts the ground behind where the axis of the rotating handlebars points. So much for that comparison.
This paper by a UCLA Physics professor describes some very interesting things about this magnetic setup in a lot more technical detail. Some of the math went over our heads, but we'll close with a few interesting conclusions from that paper:
- It's obvious that there is a minimum rotation speed required to get it working. The paper shows that there is a maximum speed as well, above which the top becomes unstable.
- The paper argues that gyroscopic forces alone are not enough to provide the stability. There's something going on with the way the top precesses around a point that's the real key to success.
Levitation is tricky!


