DIY Magnetic Chess Board

This isn't what it looks like. We're not making a complete magnetic chess set today. Though that's something a few of us always seem to be tinkering with, this article is more about an important piece of the process: Prototyping.
How much pull force do I need for a magnetic chess piece? What magnets will provide that force? For a company that prides itself on its popular online Magnet Calculator, here's a surprising answer: We don't know.
In the hopes that this prototyping path helps you answer your magnetic questions, join us as we try to answer it for ourselves.
Outline the problem
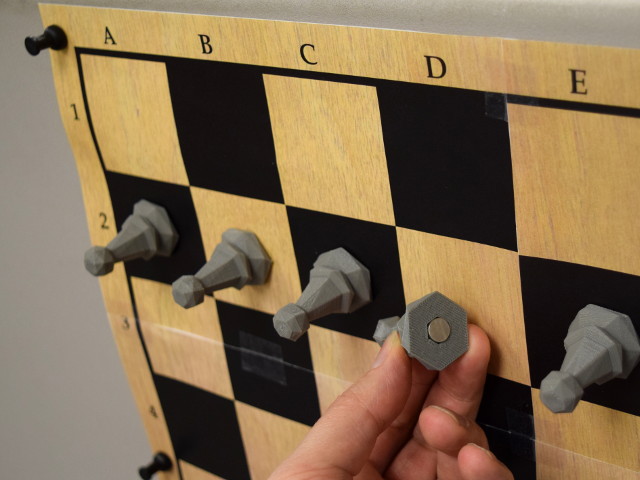
In any magnet selection task, first outline the exact problem. Say or write it down explicitly. In our case, we want a chess set that sticks to a cubicle wall, so we can play correspondence-style. The board is a simple square printed out on office paper.
Don't skip this seemingly obvious step. Depending on the problem statement, you might come up with very different magnet answers. For example, the strength you need for a vertical board like this might be quite different from a tabletop version.
There are plenty of counterintuitive magnet examples, but here's a relevant one: it turns out that you need a stronger magnet for sticking the chess piece on a vertical steel wall than you would playing on the ceiling. That has to do with Leverage and Friction.
Set Constraints and Make a Ballpark Estimate
For today's experiment, we're only considering 1/16" thick disc magnets. It's a convenient shape to glue to the bottom of our 3D printed chess pieces.
How strong should it be? Well, it's basically a fridge magnet, so maybe that offers a hint. The K&J Magnetics category called Fridge Magnets: Thin Discs contains a likely selection. Looking at their strength, they all seem to fall under 10 lb, with the average around 4 lb.
We guessed that the best force for this chess piece might be 4 lb or less. They're like fridge magnets, but the weight of the printed plastic piece is super light. Also, they're not being used to hold up papers or stacks of papers, so something less than a listed 4 lb force might feel OK.
Build and Try It Out

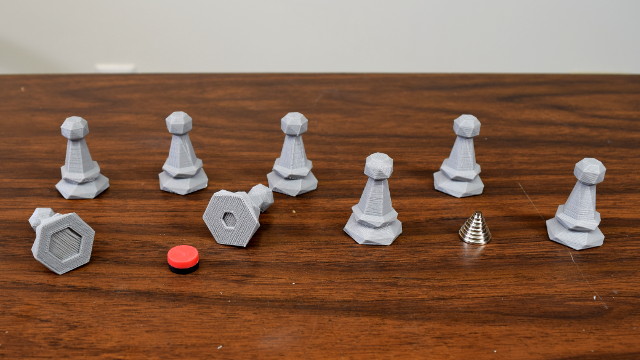
We printed eight pawns with inset spaces to glue disc magnets ranging from 1/8" diameter to 9/16". Each successive piece uses a magnet whose diameter is 1/16" larger than the last.
| Magnet | Diameter | Result |
|---|---|---|
| D21 | 1/8" | Definitely too weak |
| D31 | 3/16" | Too weak |
| D41 | 1/4" | A little weak |
| D51 | 5/16" | Nice strength |
| D61 | 3/8" | Nice strength |
| D71 | 7/16" | A little strong |
| D81 | 1/2" | A little strong |
| D91 | 9/16" | Too strong |
Why didn't we use stronger N52 magnets? We could have, but wanted to limit the variables. All else being equal, sure, an N52 grade will be stronger than N42. We were trying more to get a sense of the right pull force. The idea is, once we have a good target, we could choose either grade by varying the magnet size to achieve the goal.
Conclusions
Whether you're developing a product that will ship thousands of units or more, or a smaller scale DIY project, it's often worth spending a little time, effort, and money in the prototyping phase. While that might increase the up-front costs a little, it often gets you to the goal more quickly and accurately.
It's pretty rare to build a prototype and not learn something.
In theory your total cost would be less if you could just get it right on the first try. If I could just get the whole project ordered in one order, I'd save on shipping! It rarely works out that way in practice, though.
Addendum on Assembly
If you were to make a complete chessboard, you'd have to insert magnets into every piece. Remember that magnets have two poles - north and south. Both poles will stick to our metal cubicle wall, but if you plan on having them stick to say, magnets in a wooden chess board, then the orientation matters. If you stick them the wrong way, your pieces will repel rather than attract!
How can you make sure all of your magnets face the right way?
In that video, we placed a D84PC-RB underneath our assembly area (we used a clear piece of glass so you can see it). This way, when we moved the magnet onto the table, it automatically flipped itself the right way for assembly into the chess piece.
If you're planning on assembling many magnets into your product, something like this is often much easier and more accurate than relying on visual markings on each magnet.


